![]()
Shakuhachi Craft Techniques
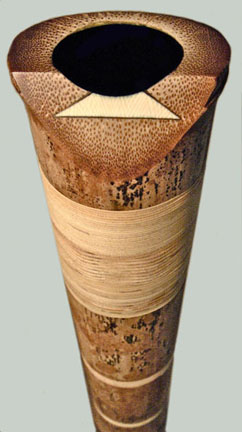
Making the Mouthpiece & Inserting the Utaguchi Inlay
|
Shakuhachi Craft Techniques Making the Mouthpiece & Inserting the Utaguchi Inlay |
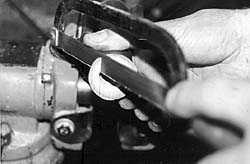 |
Cutting the blowing edge of the shakuhachi at the appropriate angle. A bamboo saw with very fine kerf is used in this process. Traditional tools for making shakuhachi are becoming increasingly difficult to find as the younger generations fail to take on apprenticeship in the craft. |
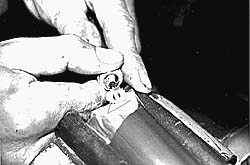 |
The utaguchi (which translates from Japanese as "song mouth") is marked on the blowing edge surface and cut with a small, high-speed circular saw. This is my own technique which results in a very accurate fit. |
 |
The corners of the utaguchi cut are carefully finished with a fine hand saw and needle files. The utaguchi shown in these photos is traditionally used by the Kinko Ryu. Tozan and Meian Ryu use a curved utaguchi which is more difficult to insert. |
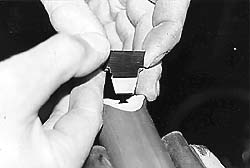 |
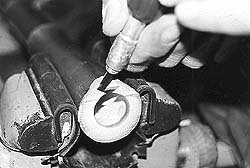
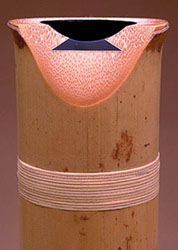
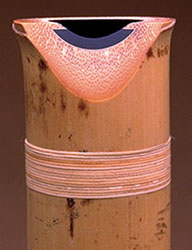
The utaguchi itself is fashioned from a piece of water buffalo horn or, more commonly, from acrylic and carefully shaped to match the angles of the cut placed in the bamboo. A fine strip of silver or gold is often wrapped around the utaguchi to provide a highlighted border in the finished piece. |
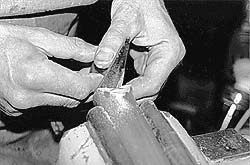 |
Once the utaguchi is inserted, glued and cut, the curvature of the blowing edge is reshaped to precise dimensions. The depth and degree of curvature is critical to the performance of the instrument. |
Click here to see images of the Kinko Ryu and Tozan Ryu utaguchi.
Flute Making Craft Manuals Request Information about Madaké Bamboo for Shakuhachi |